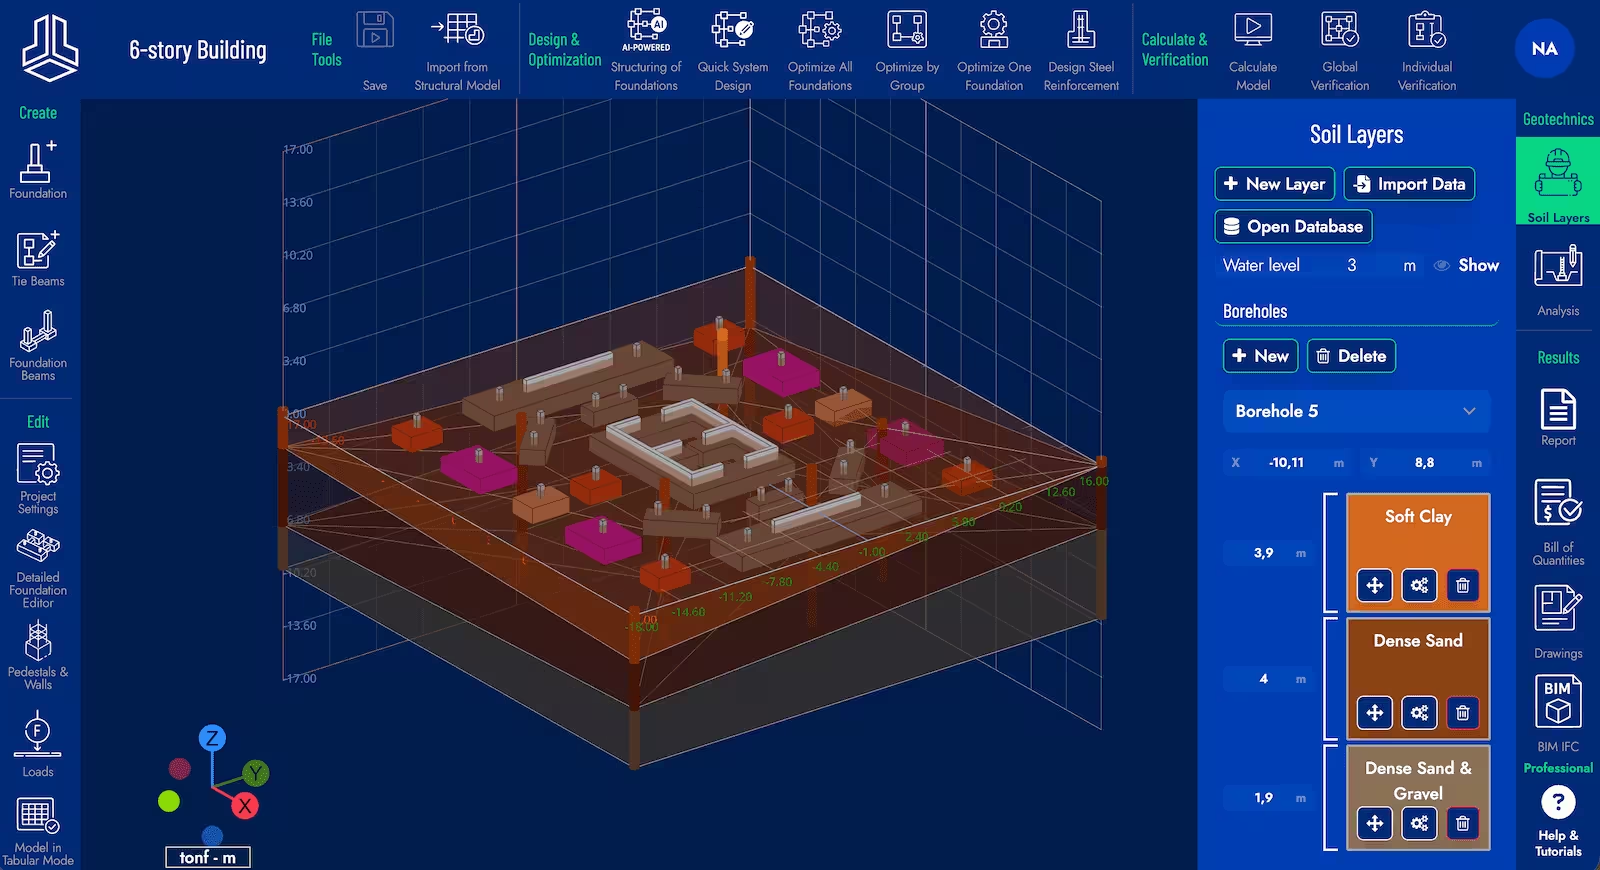
Soil Setting
To configure the soil settings for geotechnical analysis, go to the Soil Layers tab in the Geotechnical Analysis section of Foundaxis.
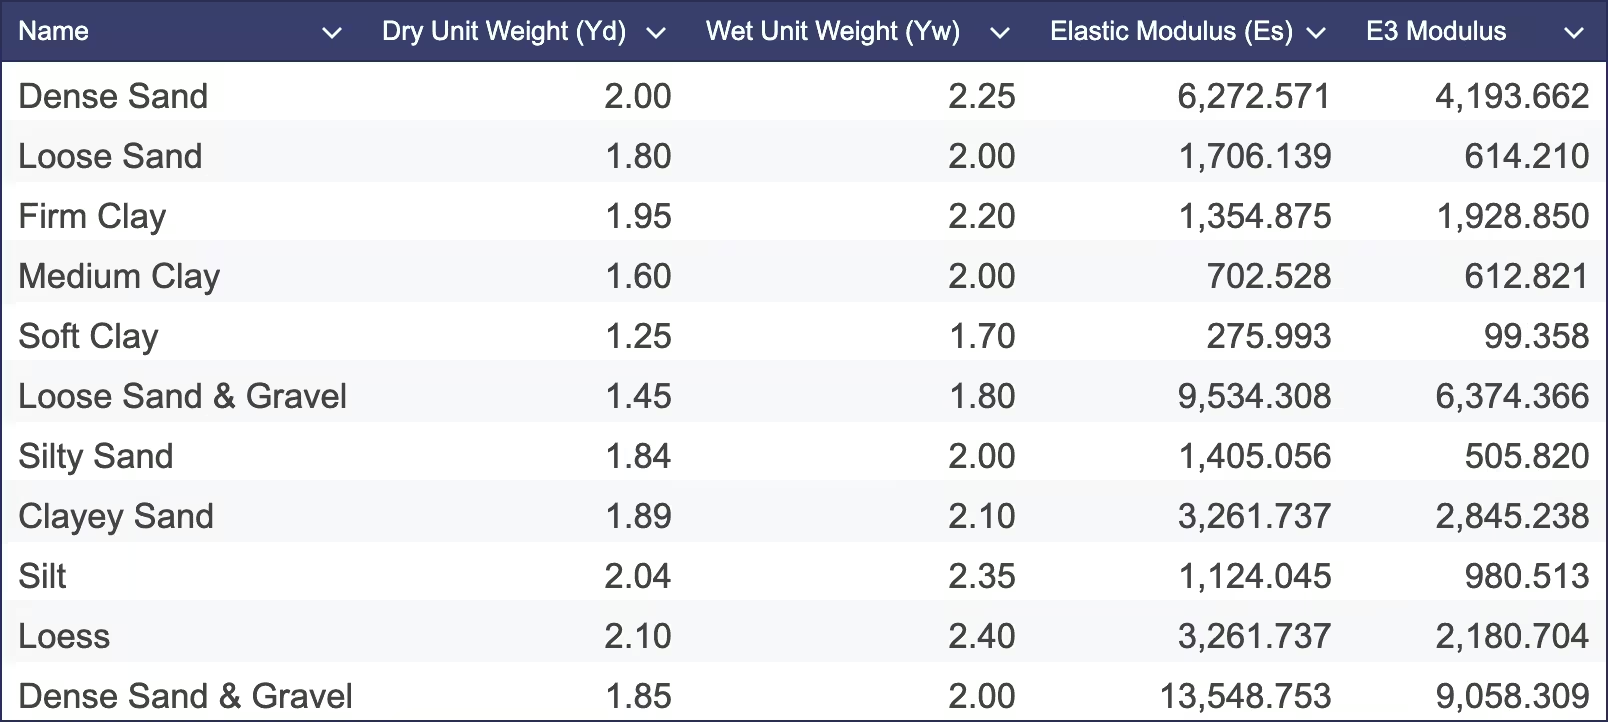
Default System Layers
Foundaxis includes a set of predefined soil layer configurations that can be used as a starting point for your geotechnical analysis. These default system layers cover common soil types and conditions. You can select any of these configurations from the Preset section when creating a new soil layer.
Create Terrain Layer
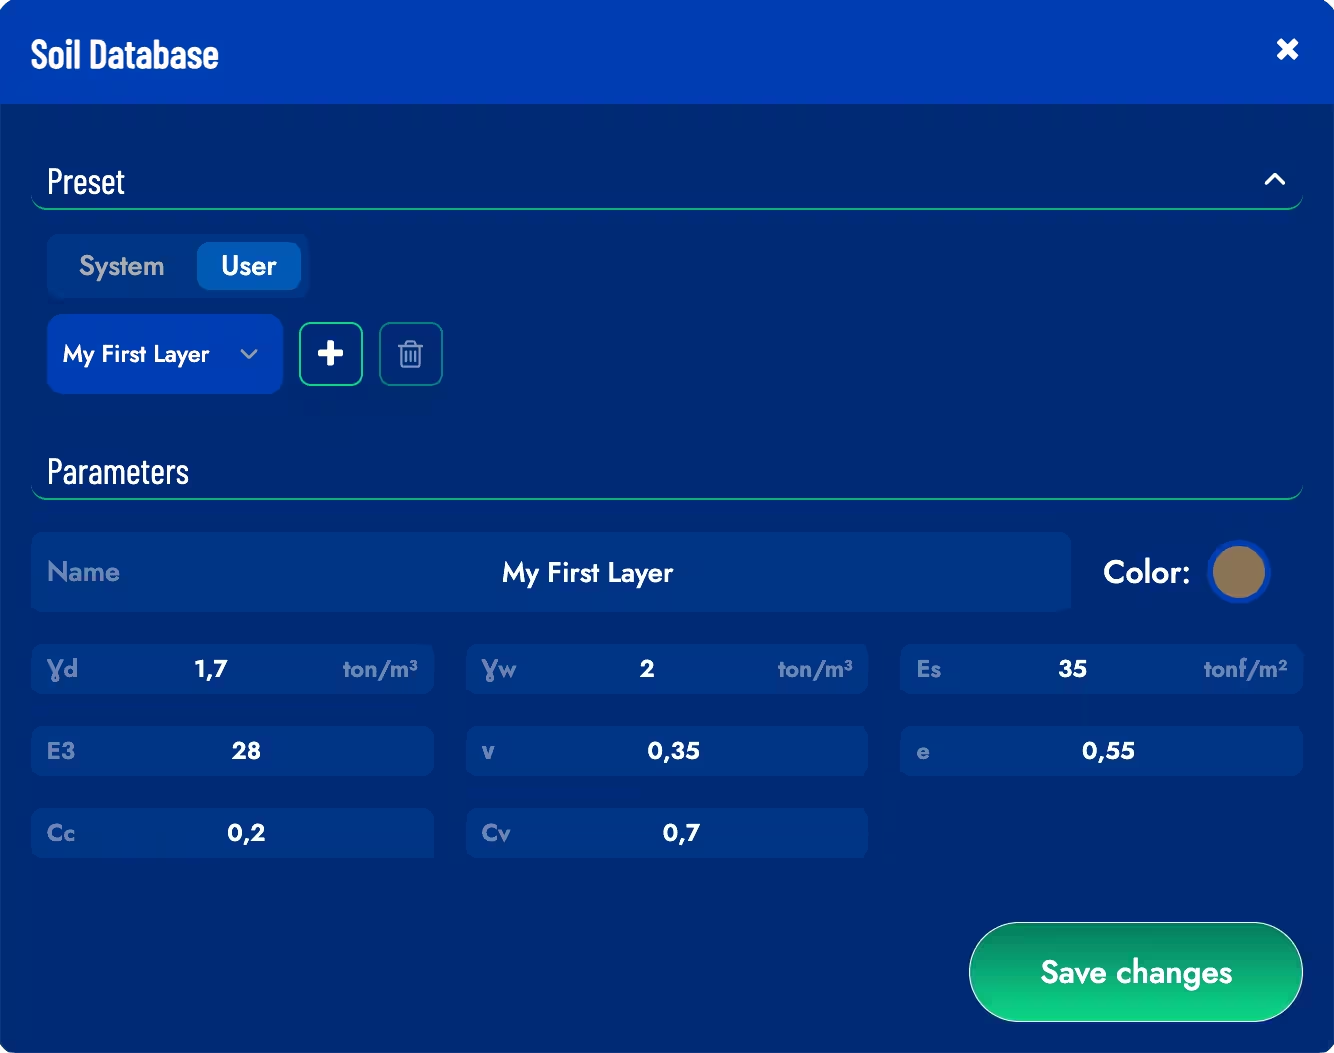
Press the New Layer button to create a new soil layer. A dialog will open where you can define the parameters of the soil layer.
It is possible to base your new soil layer configuration on an existing one by selecting it from the Preset section. There you can find System soil layers as well as any custom soil layer configurations you have created previously.

Import Soil Layers from Excel
You can also import soil layers and their thicknesses per borehole point from an Excel file. To do this, press the Import from Excel button. The names of the soil layers in the Excel file must match the soil layers in the database exactly.
The folling image shows an example of the format of the Excel file for importing soil layers:
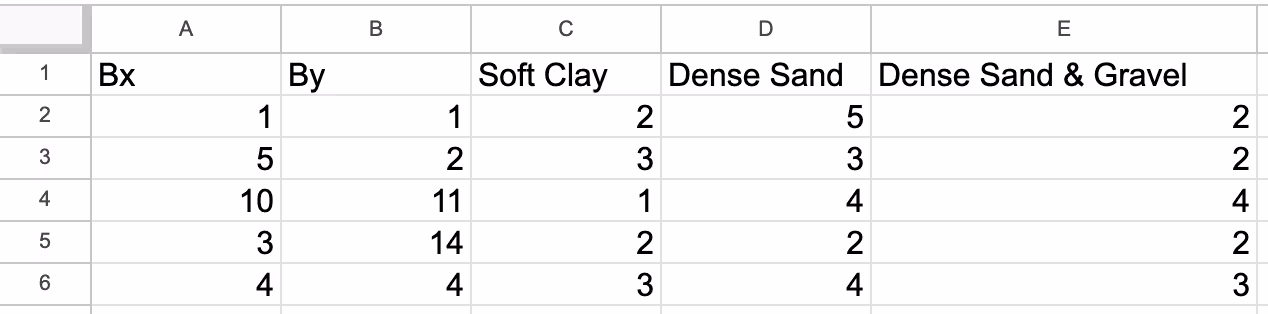
As shown in the example, the first 2 columns contain the X and Y coordinates of the borehole points, while the subsequent columns represent the different soil layers. The values in the cells indicate the thickness of each soil layer at the corresponding borehole point.
Manage User-Defined Soil Layers
You can manage your custom soil layer configurations in the Open Database section. Here, you can edit or delete any soil layer configurations you have created.
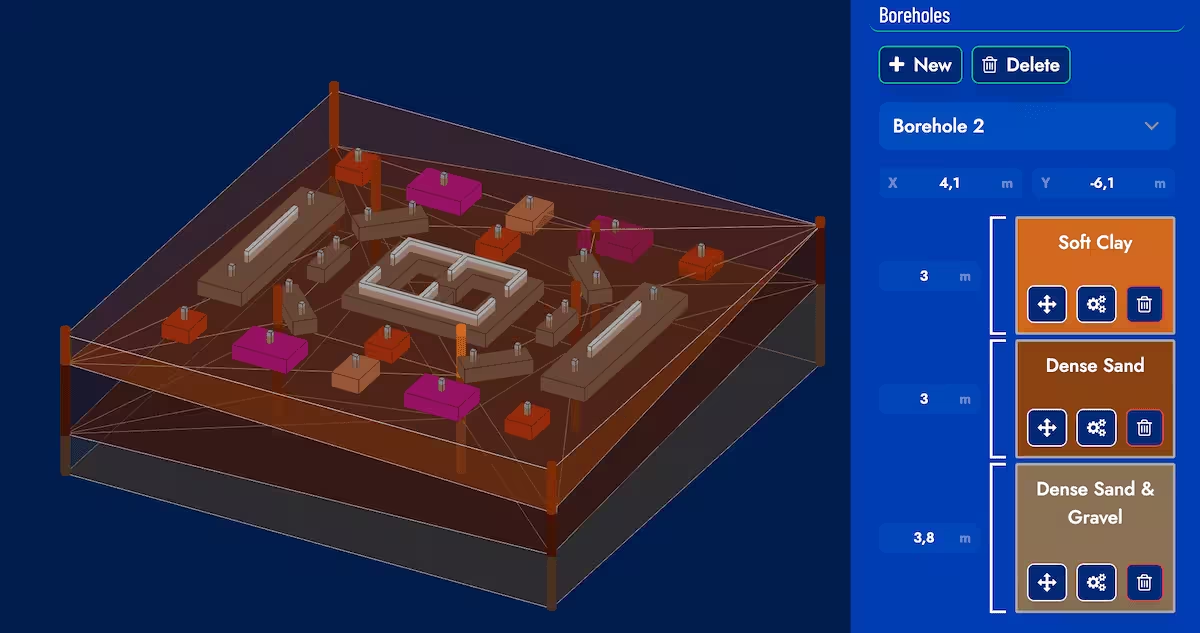
Boreholes
Here you can add borehole points to specify different thicknesses of soil layers at different points in the domain, in order to configure irregularly layered soils. By default, drill holes are created at the 4 corners and one central drill hole. If you do not create more drill holes, using this central drill hole you can vary the height of the layers in a homogeneous manner.
The height of the layers can be varied by selecting the appropriate drill hole and modifying the fields in the layer diagram in the dialog box or by selecting a layer in the diagram and moving the corresponding arrows in the model.