Detailed Foundation Editor
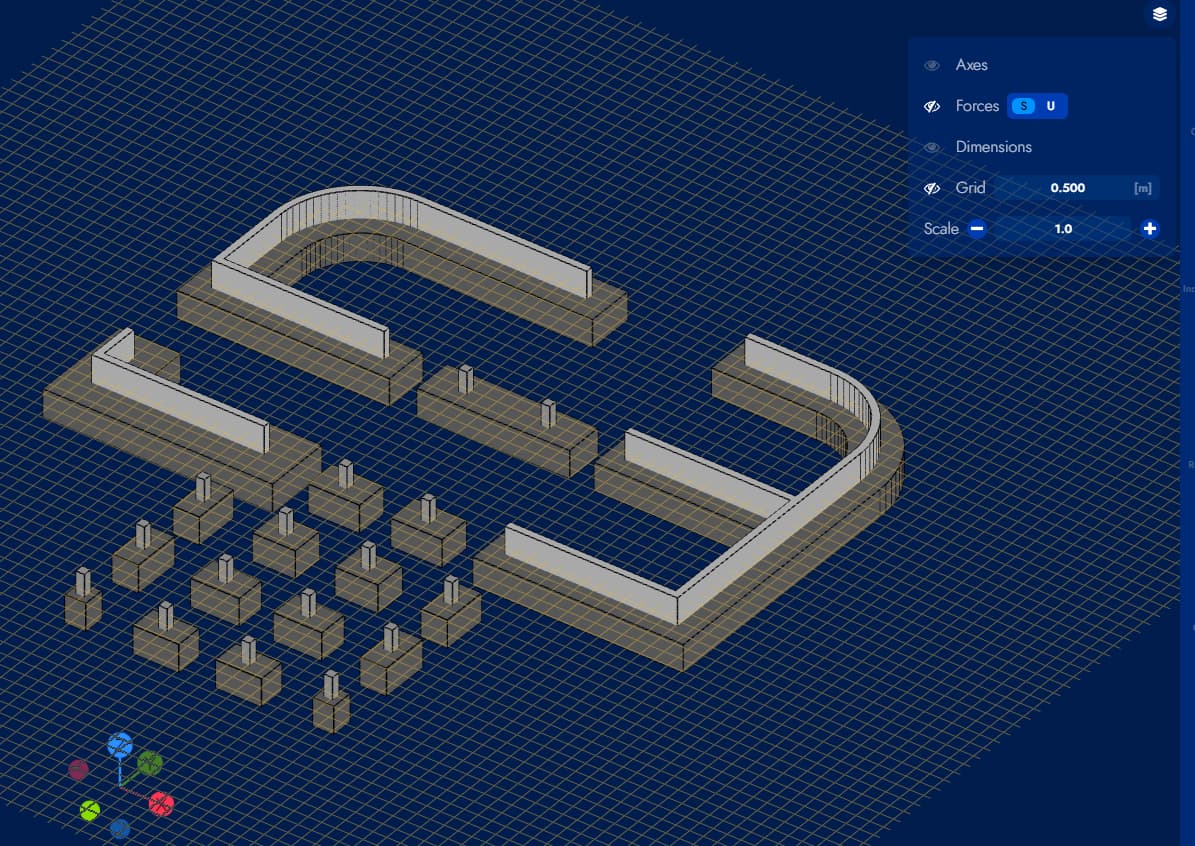
Create a New Foundation
If no foundation has been selected in the model, it is possible to cycle through the 3 foundation types and add a new foundation using the Create button.

Isolated Foundations
When selecting an Isolated foundation, the panel box displays submenus for the edition of the selected foundation and the dimensions and loads of the pedestal are displayed in the model for the selected foundation.
Below is a view of the interface in Isolated foundation editing mode. Each submenu is described in detail.
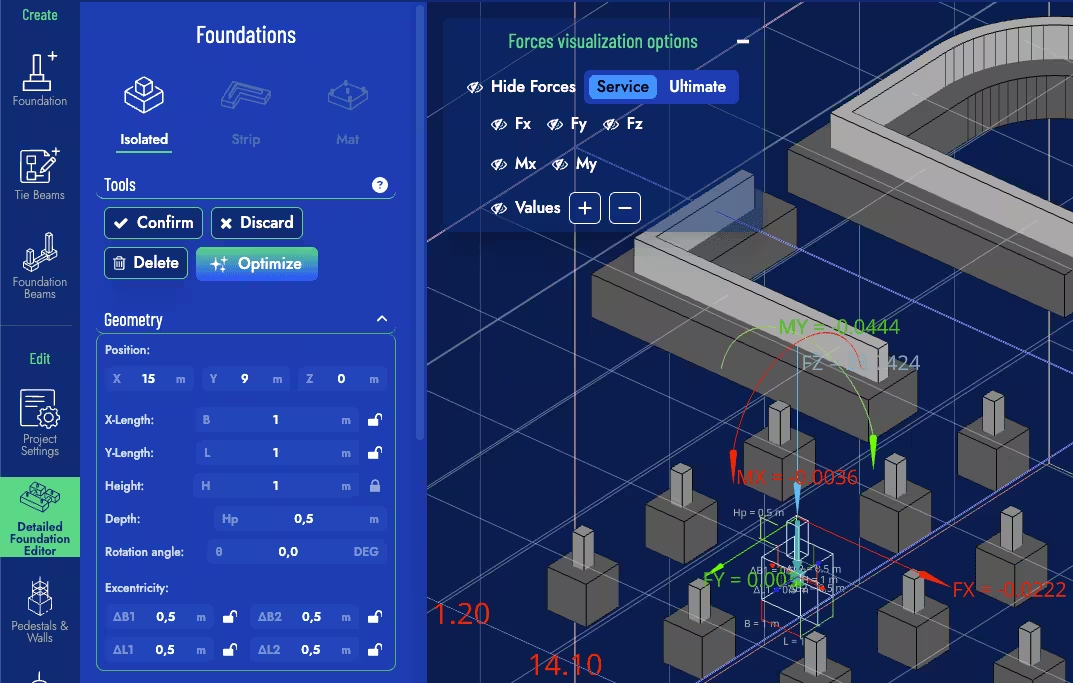
Tools
- Confirm Button: Confirms the changes made. If this button is not pressed before exiting the editing mode, the changes made are not saved.
- Cancel Button: Cancels the changes made and exits the editing/creation mode.
- Delete Button: Deletes the selected isolated foundation.
- Optimize Button: Optimizes only the selected foundation
Geometry
Edit the dimensions of the selected foundation using this submenu. Note that it is possible to edit the position of the pedestal in order to achieve eccentricity in both directions.
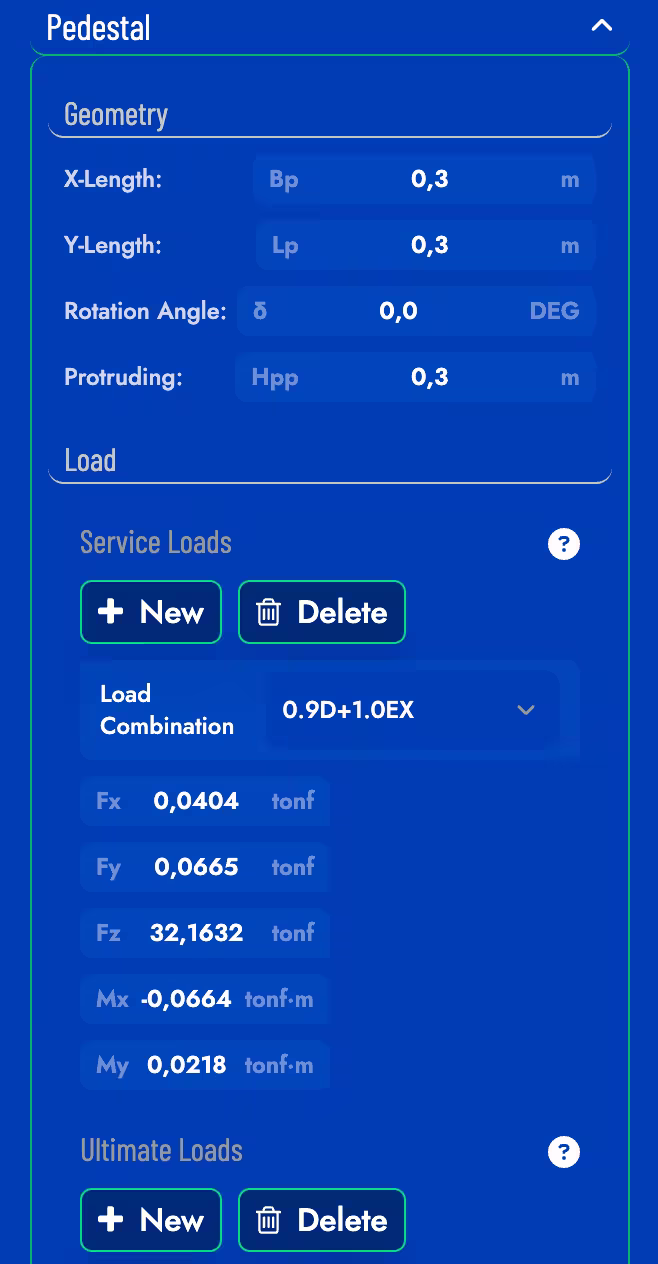
Pedestal
In this submenu, it is possible to edit the geometry of the pedestal and the loads associated with the different combinations.
Strip Foundations
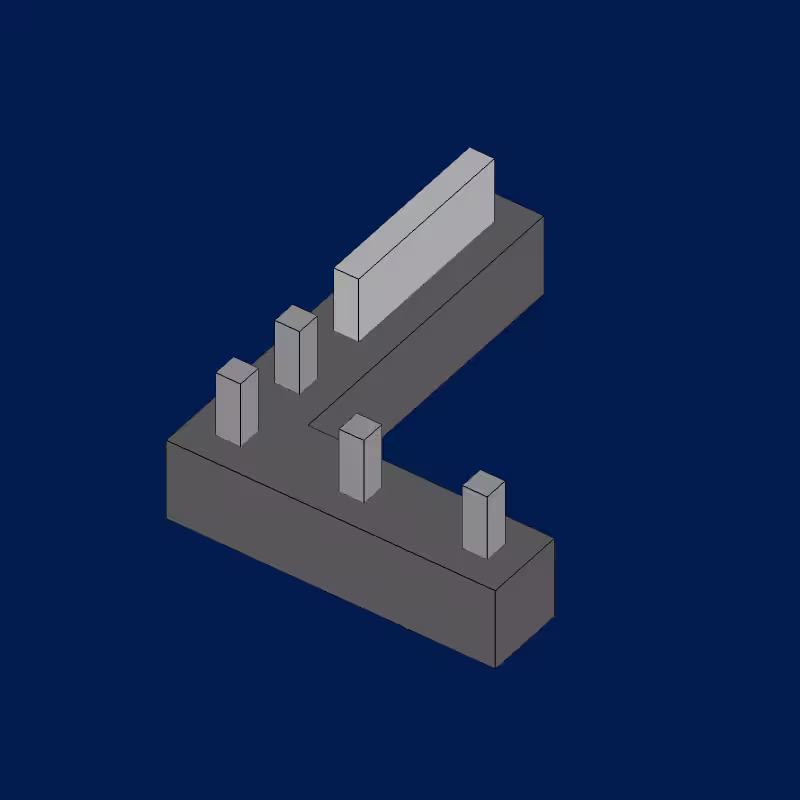
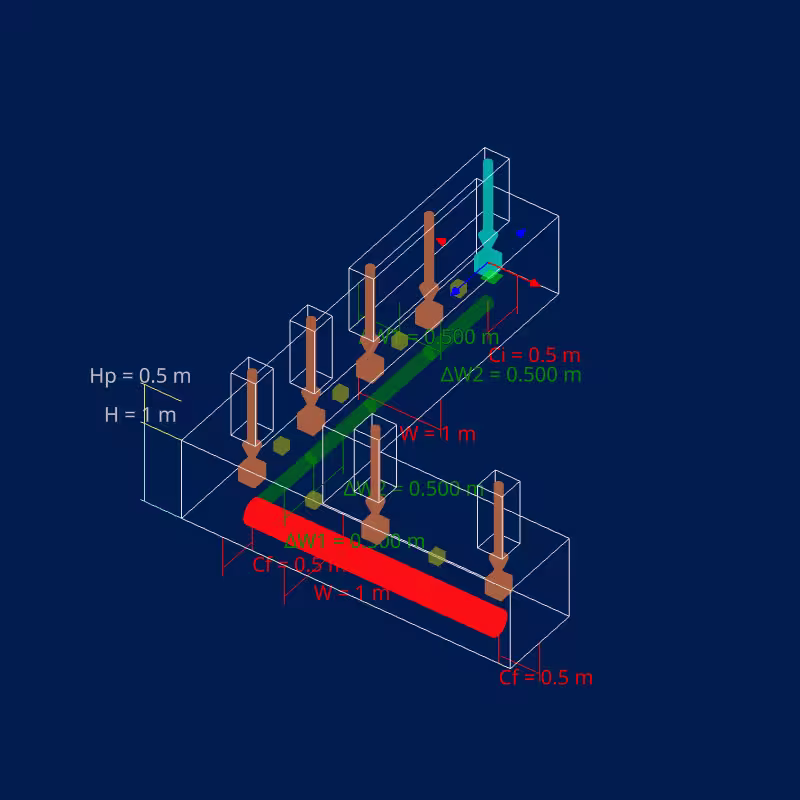
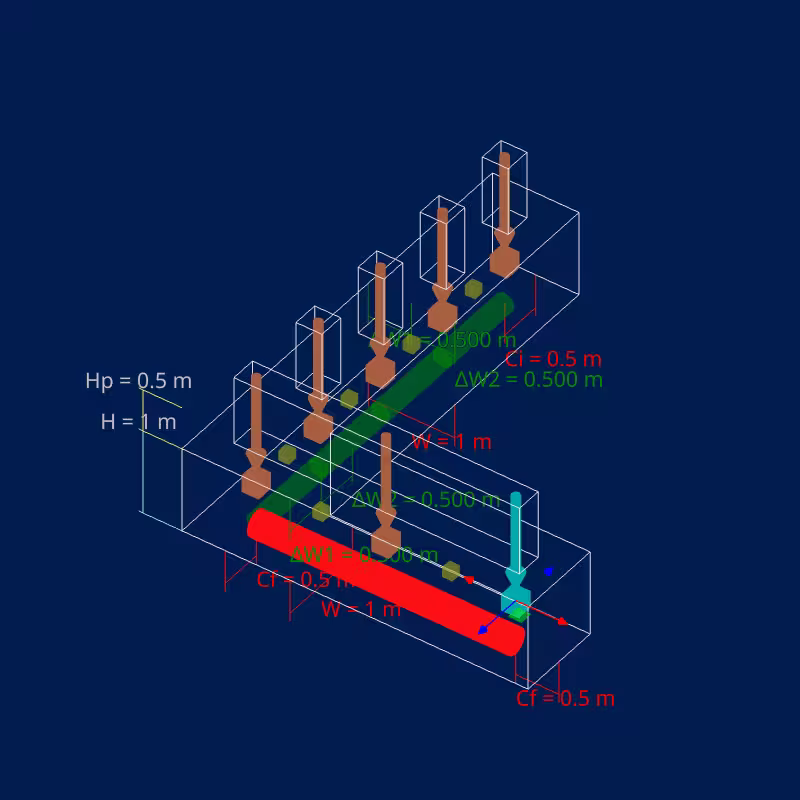
A strip foundation in Foundaxis is defined by visually identifiable segments with different colors. Each segment can have different widths.
Within each segment, points are defined that may or may not be loaded (unloaded points only serve the function of defining the geometry of the segment). Points can be repositioned by selecting and dragging them in the model or by changing their coordinate in the dialog. To create a new point between two existing ones, click on the intermediate marker that is always available.
When selecting a strip foundation, the components of that foundation are displayed and it is ready to be designed. The changes made will only be effective after pressing the Confirm button in the main tools.
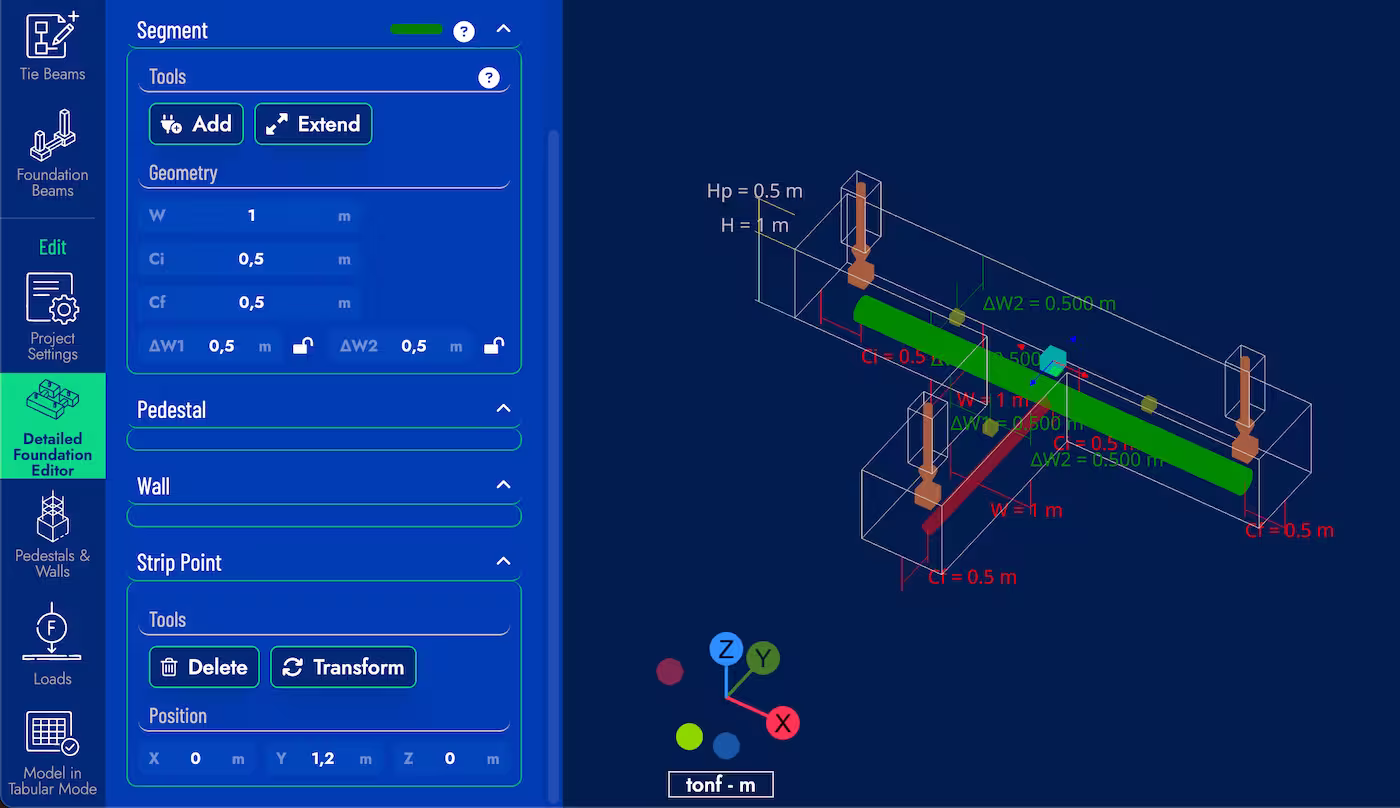
Below is a selected strip foundation and the submenus that are displayed in the editing dialog. Each submenu is described in detail below.
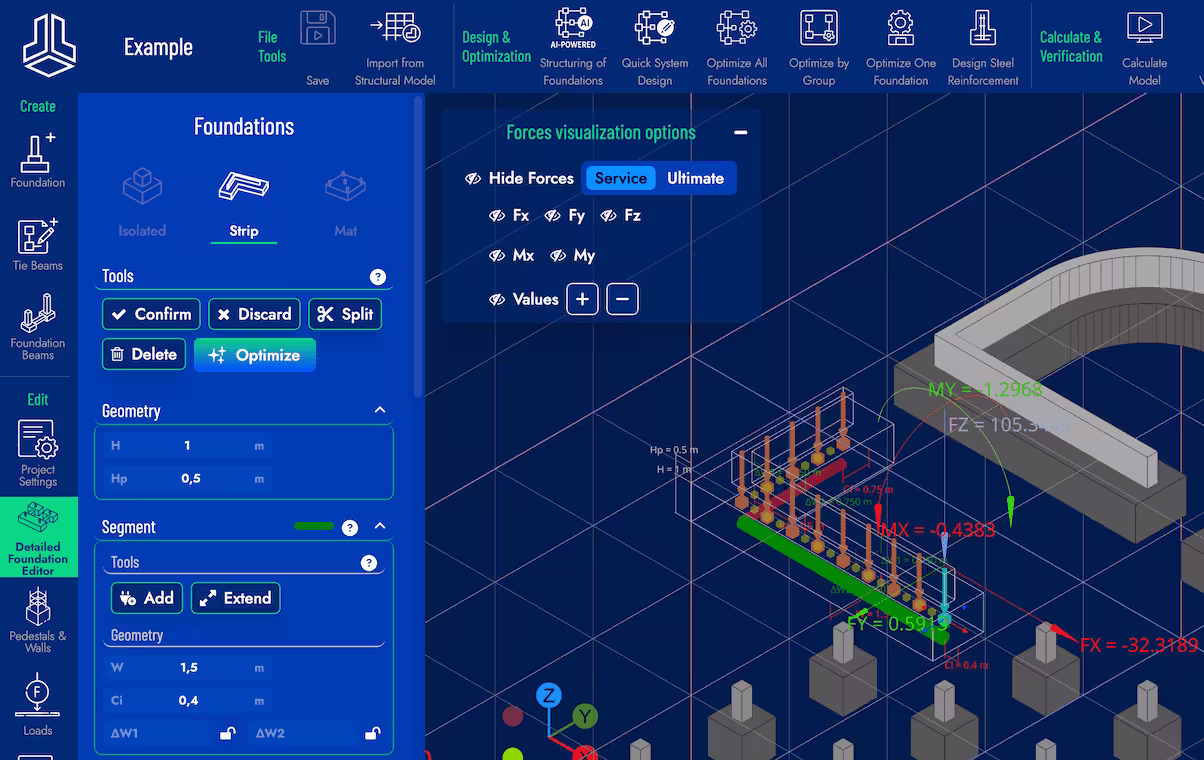
Tools
- Confirm Button: Confirms the changes made. If this button is not pressed before exiting the editing mode, the changes made are not applied.
- Discard Button: Cancels the changes made and exits the editing/creation mode.
- Split Button: Destroys the selected Strip foundation and all its load points are converted into independent Isolated foundations.
- Delete Button: Deletes the selected Strip foundation and all its load points.
- Optimize Button: Optimizes only the selected foundation.
Geometry
Edit the height (H) and depth (Hp) of the selected foundation using this submenu.
Segment
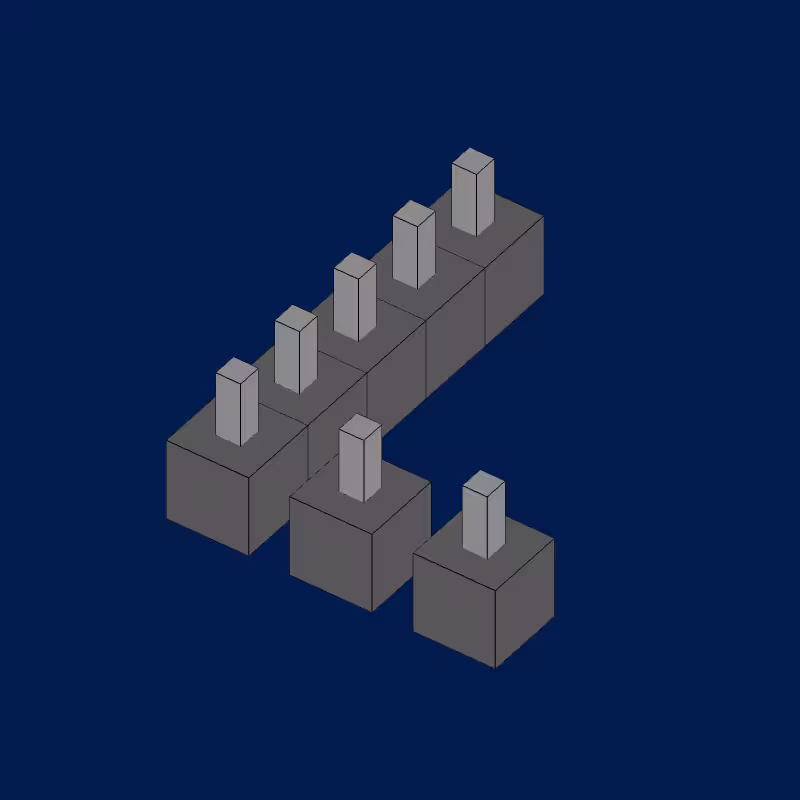
The segments that make up the Strip foundation are represented by colored bars. To select a segment, simply click on its corresponding colored bar in the design space.
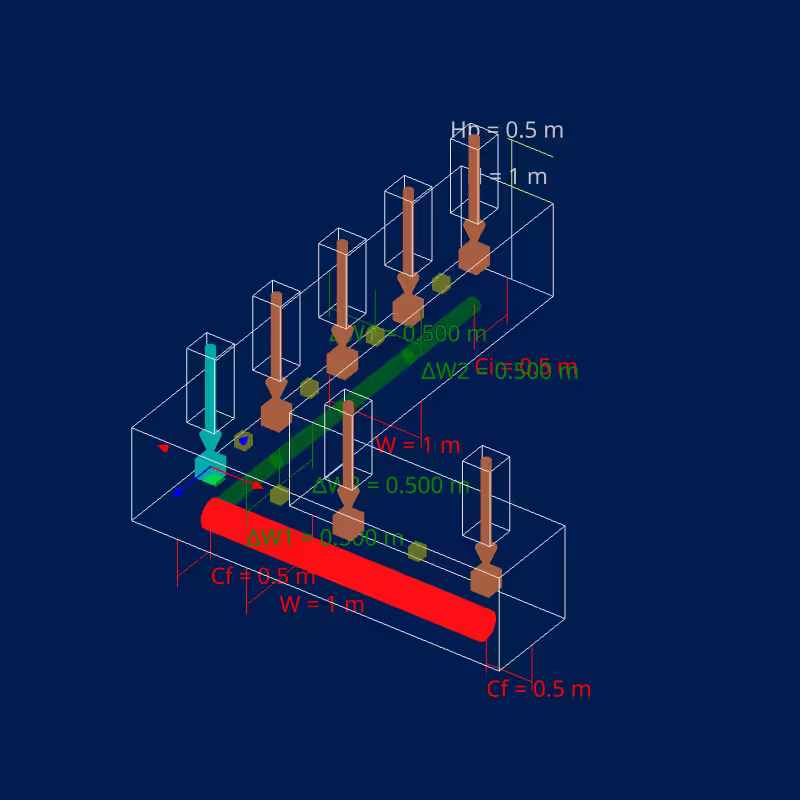
In this submenu, it is possible to edit the width of each segment along with the cantilever lengths and the segment eccentricity. There are also two buttons available:
-
Add Strip Segment: Enter the creation mode of a new Strip segment. Click on any point of the design space to place points that will define the geometry of the new segment. For the segment to be valid, at least two points must be placed and it must be connected to the existing Strip foundation. To finish the creation of the segment, press the Confirm button in the main tools.
Before starting the creation, a dialog will appear to set the parameters of the new segment:
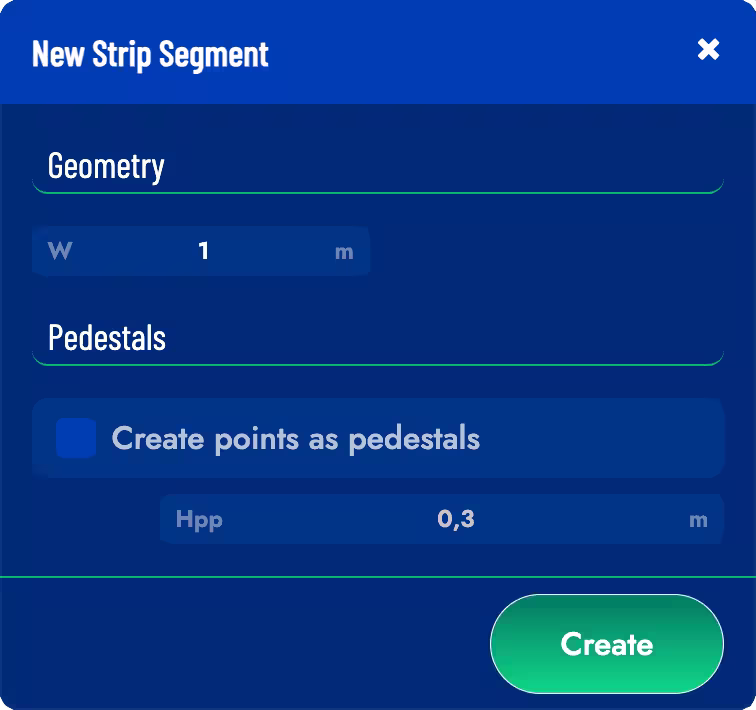
W: Width of the new Strip segment.
Create points as pedestals: If this option is checked, the points of the new segment will be created as pedestals, otherwise they will be created as unloaded points.
Hpp: Protrusion height of the new segment pedestals.
-
Extend Segment: Enter the creation mode to extend the selected Strip segment. The first selected point must be an endpoint of the segment. After selecting it, click on the design space to place points that will define the geometry of the extension. To finish the creation of the extension, press the Confirm button in the main tools.
Before starting the creation, a dialog will appear to select if the new points will be created as pedestals or unloaded points:

Pedestals
If the Strip foundation has pedestals, this submenu will allow editing the geometry of the pedestal and the loads associated with the different combinations. To select a pedestal, simply click on its corresponding marker in the design space. To move it, simply drag it in the model.

This section has 3 tools available:
- Transform Button: Converts a pedestal into an unloaded point.

- Delete Button: Deletes the selected pedestal.

- Create Wall Button: When multiple pedestals are selected, this button creates a wall between them.
Walls
If the Strip foundation has walls, this submenu will allow editing the Width, Protrusion Height and the loads associated with the different combinations. To select a wall, simply click on one of its load points marker in the design space.
This section has 2 tools available:
- Delete Button: Deletes the selected wall.

- Split Button: Split the selected wall into pedestals.
Strip Points
When selecting an unloaded point in a Strip foundation, a submenu will appear to edit its coordinates. The option to delete the point and to transform it into a pedestal is also available.
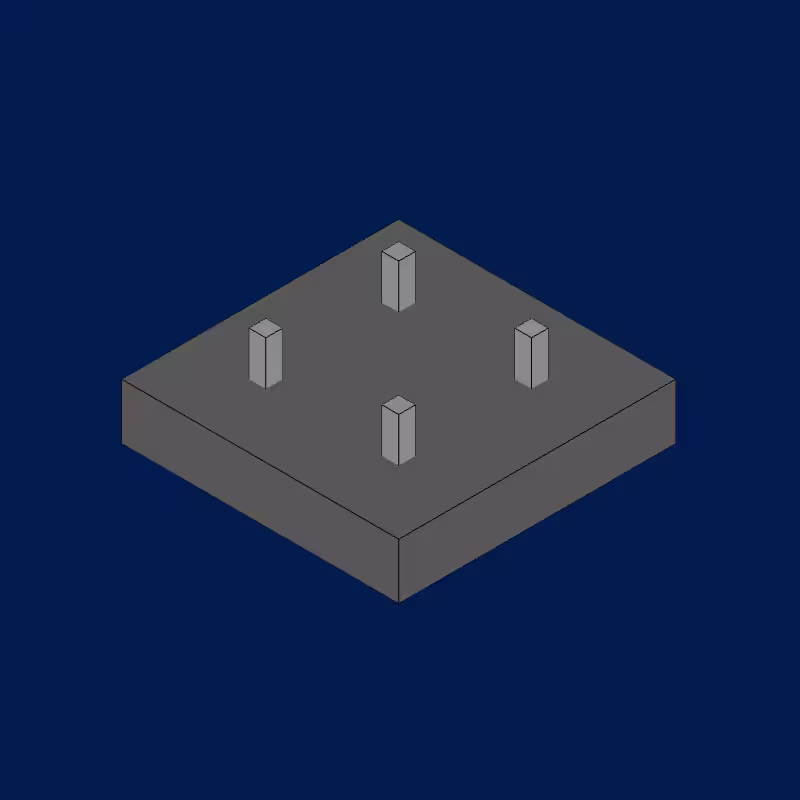
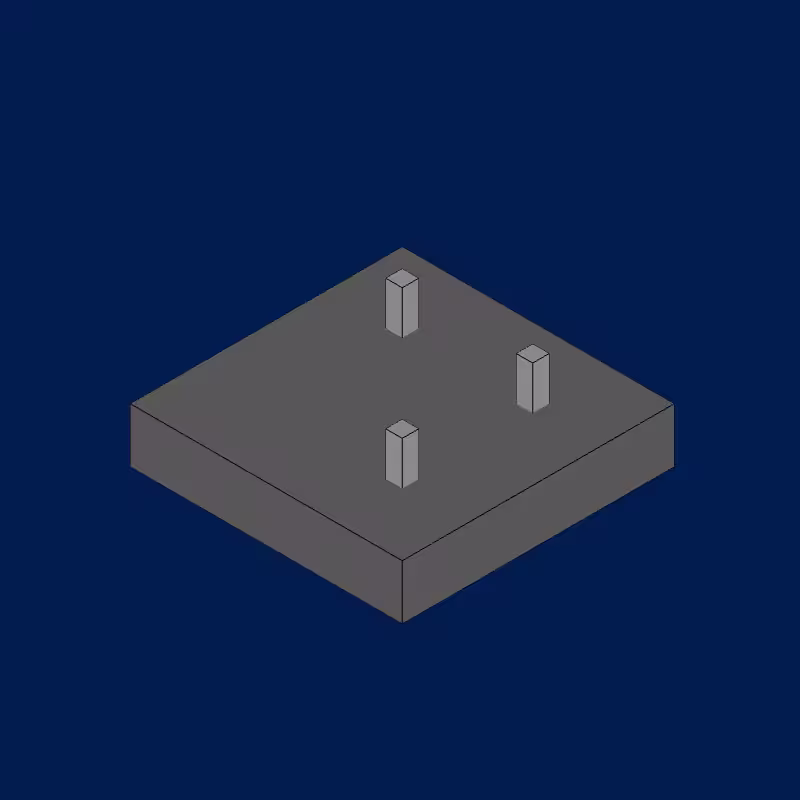
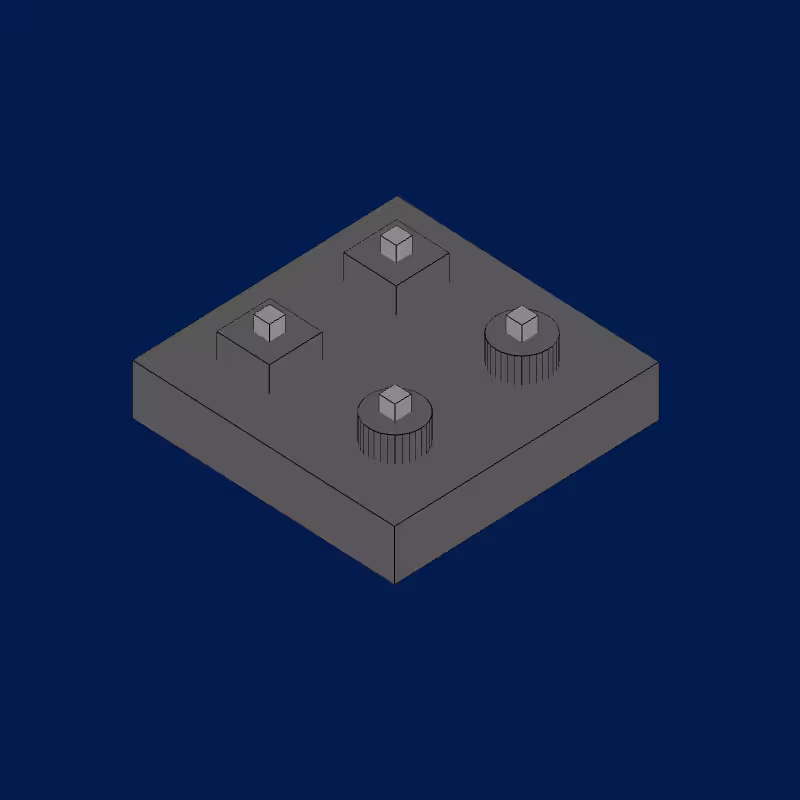
Mat Foundations
Mat foundations are made up of polygons defined by their vertices and the thickness of the slab. They can have pedestals or walls inside, defined by force points.
Once the vertices are selected, they can be moved by dragging them in the model or by changing their coordinates in the editing panel.
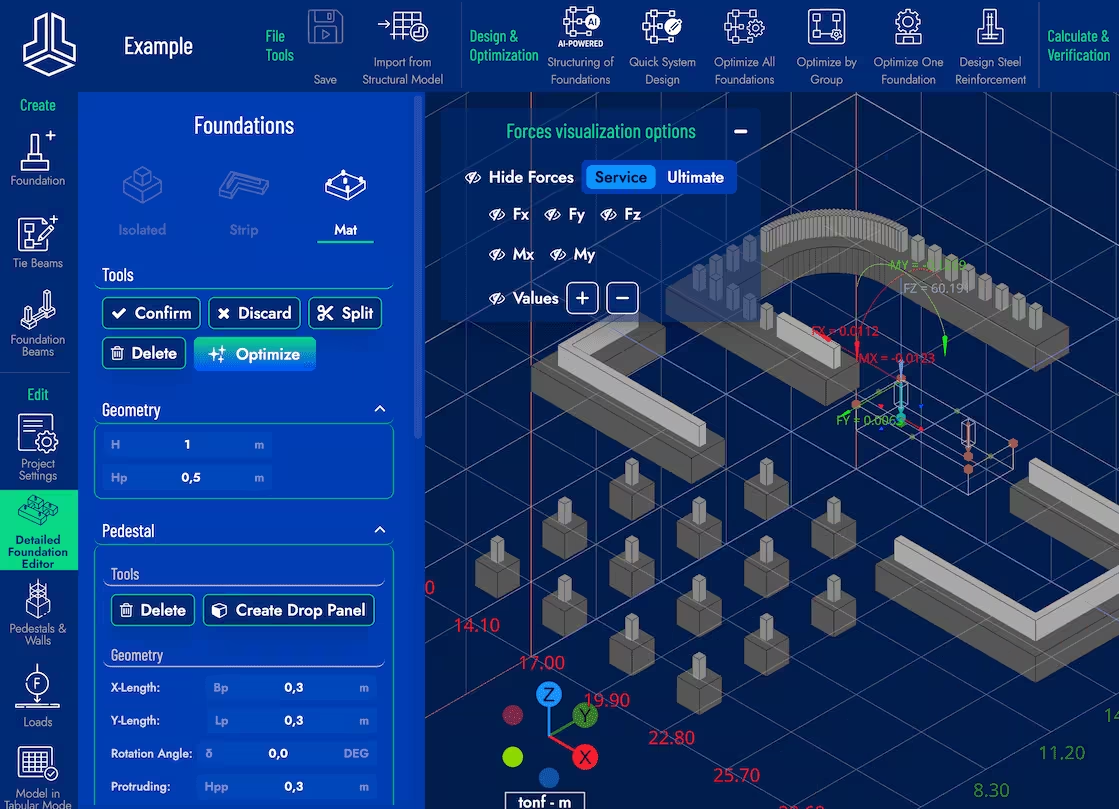
Tools
- Confirm Button: Confirms the changes made. If this button is not pressed before exiting the editing mode, the changes made are not applied.
- Discard Button: Cancels the changes made and exits the editing/creation mode.
- Split Button: Destroys the selected Mat foundation and all its load points are converted into independent Isolated foundations.

- Delete Button: Deletes the selected Mat foundation and all its load points.
- Optimize Button: Optimizes only the selected foundation.
Geometry
Edit the height (H) and depth (Hp) of the selected foundation using this submenu.
Pedestals
In this submenu, it is possible to edit the geometry of the pedestal and the loads associated with the different combinations.
There are also two tools available:
-
Delete Button: Deletes the selected pedestal.
-
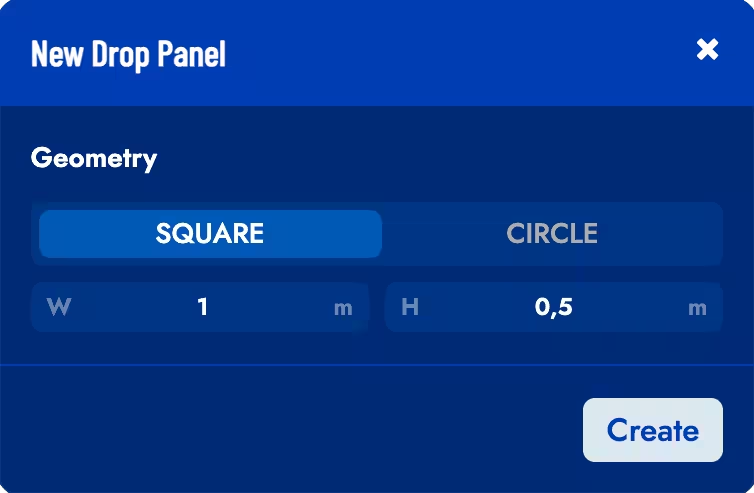
Create Drop Panel Button: Adds a drop panel to the selected pedestal. A dialog will appear to set the dimensions of the new drop panel.
Walls
If the Mat foundation has walls, this submenu will allow editing the Width, Protrusion Height and the loads associated with the different combinations. To select a wall, simply click on one of its load points marker in the design space.
The tools available are the same as in the Strip foundation walls submenu.